Ok, so I have been quite crafty my entire life. In fact, there are not too many things that I can honestly say that have not at least tried or have successfully done for some time.
My latest venture is in learning the painted furniture craze using homemade chalk paint. I must say that I am really loving it and maybe I’m going a little crazy with it because I want to paint everything in sight. So far I have painted two dressers and a coffee table. The thing is I have painted the same coffee table four, count it, FOUR times! That is because even though I loved the first color I painted it, a glowing sunflower gold, my Mother thought it was just too bright for her tastes. So I put some dark wax on to subdue the brightness then neither one of us cared for it. She still wasn’t crazy about the color and the dark wax really ruined the warmth and wonderfulness of the gold for me. So we agreed on a purple, but when it was applied it was too light and looked almost lavender. So off to Home Depot for an actual mixed color not a concoction of my making. This time the purple was the right intensity, but made our favorite hot pink lamps that are nearby look horrible!
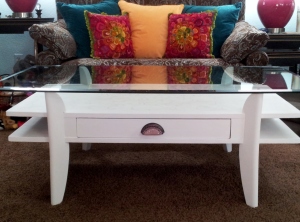
So without another word, off to the kitchen I went to make another batch of the very best chalk paint I have ever used (recipe below) this time in white, and started painting over the gold/lavender/purple. After two coats of the white paint the deep purple was covered and looking just perfect.
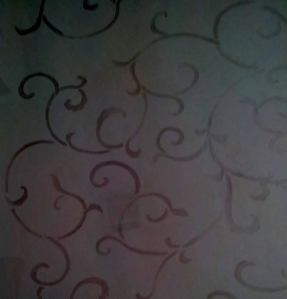
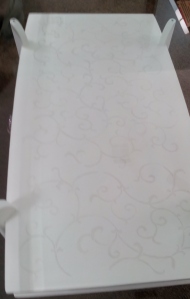
However… I couldn’t leave well enough alone, because that’s just how I roll; so I pulled out my lovely scroll stencil from Royal Design Studios called Oriental Vine Allover Pattern as well as my Pearl Oyster stencil crème also from Royal Design Studios and I proceeded to put the prettiest pearl white on white design on the table top.
I added a gorgeous purple cut glass cup pull to each side for the drawer that I
purchased through MyKnobs.com. It came out looking so lovely and I’m very proud of it. I finished all of my projects with Johnson’s paste wax in the natural color.
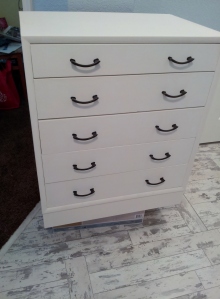
The dresser’s I have been redoing for my mother are the ones that she has been using for 40+ years and are certainly showing their age.
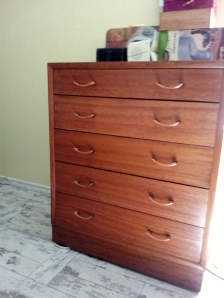
This picture makes them look WAY better than they really are. The veneer is taped down with masking tape (that was my Grandma’s idea!)
I have been painting them white to match her new bed.
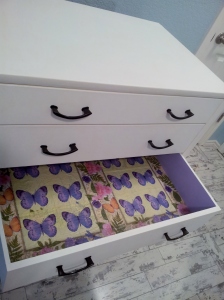
I have been painting the inside of the drawers a different color theme to match the drawer liners in each one. She has seven (that’s right 7!) of these little dresser’s she is using in her bedroom. My (not so) secret liners are napkins from the party store! I wanted her to have something really pretty and flowery. It is hard to find liner paper or shelf paper that is both pretty and not that expensive as we are on a very tight budget. So I had the brilliant idea to use Mod Podge and pretty napkins as the liner. It worked, but I had to switch from regular Mod Podge to the one specifically for paper. These dressers are also turning out so beautifully, my Mom loves them so much and what a difference!
I used oil rubbed bronze spray paint by Rustoleum to refinish the drawer pulls because we both agreed that they still looked terrific if they were just updated to go with the white. So tell me what do you think?
What I don’t get is why after spending all that time working on something and making it look so great, would I want to take sandpaper to it and make it look like has been through a storm? I follow several blogs and these wonderful people do some great work and I see their beautiful pieces that they are working on and then they sand half the finish off? Am I missing something? Am I the only one who is not a fan of the distressed look? It is so popular, and I realize that it has a huge following so there must be something to it that I am just not appreciating fully. I guess it is another one of those cases of beauty is in the eye of the beholder.
I found this recipe somewhere on the blogosphere a while ago and I will be darned if I can find it again to be able to give credit where credit is due. I wish I could find it because it is wonderful. It makes a smooth velvety paint that goes on so nice and requires almost no sanding (unless you want to) and sticks like crazy. No primer required even over a dark stain (I know from experience). It is really terrific.
Home-made Chalk Paint Recipe:
1 Cup Flat or Statin latex paint
¼ Cup Baking Soda
1 Tablespoon water (optional)
I have doubled this recipe for a bigger project with no problem. I just needed to add a little water to thin it a little as it started to get a little thick as time went on. This baking soda recipe makes the most velvety paint and it sticks like crazy! No priming or sanding ahead of time required!!
Links:
http://www.myknobs.com/lew49308.html
Since I am new to this blogging thing, I hope you will check back often to see what is going on here, or better yet start following me by clicking on the link above. 🙂

